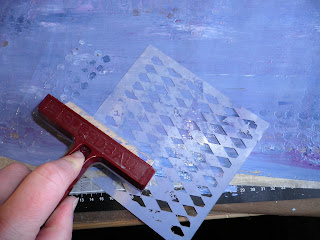
You need a craft sheet, brayer, and acrylic paints, I used dabbers and took the lids off, squeezing the paint onto the mat.
So first you nee to squeezre some paint onto your mat - don't put too much on or you will have a really thick layer of paint, and it will take longer to dry.
Using your brayer smooth the paint out - roll in different directions to mix the paint and create the effect you want.
Now you need stensils, sequin waste, stamps, bubble wrap - anything that will make an impression in the paint. Stamp into the paint, and brayer over masks so you get the pattern impressed into the paint.
It should look something like this ...
Once you are happy with it get your paper (I used A3 copier paper) and place it over the top. Firmly pat and press the paper down - do not rub or you will rub the patterns out. Carefully life the paper up and let it dry.
You should end up with papers like this ...
Now to use it!
I love these alterable files and thought I would se the paper to create a decopatch effect for my file.
Simply tear your papers into peices ...
And then randomly cover the file with them. I like the edges to be neat so I make sure there is enough to fold over the edges.
Finally I decorated it ...
I cut the Weathered clock, butterflies and tattered flower out of grungepaper and stained it using dylusions crushed grape and fresh lime sprays. While it was drying, I spritzed the inks over the file to add another layer of colour. I also added some frantage to it. Once everything was dry I put the diecuts on using glossy accents and added pearls to the butterflies and a big button to the flower.


fab tutorial and idea. Thanks x
ReplyDelete