Tuesday, 19 March 2013

Technique Tuesday - Shrink Plastic

Lisa thought it would be a great idea to have  techniques day - Tuesday seems to work!!  So on a Tuesday we will be posting techniques for you to try out.

This time we are looking at Shrink Plastic - it is not as scary as you may think HONEST!!!

A few things/tips about shrink plastic - 
  • You can get it in transparent, white or black  - I like to use the transparent as you can see through it when you stamp on to it.  
  • you need to 'prime' it before you start working with it - basically sand the surface done so the ink has something to 'grip' onto.
  • If you are colouring onto it remember that the colours will deepen as the plastic shrinks, so don't be worried if it looks pale when you have coloured it.
  • stazon seems to work best on shrink plastic, it 'sets' better than versafine or memento - but if you leave them to dry for along time they can be used
  • you can put it through your printer and so use digi images if you want 
  • punch any holes you want in it BEFORE you shrink it!

So here are a couple of ideas for you to try to get you started:

I like to use the clear plastic as it means you can create charms so this is the plastic I use ...

The first thing you need ot do is 'prime' your plastic using a sanding block.  I tend to go over it all horizontally and then vertically.  Wipe it thoroughly clean.

 I stamp in stazon, and pretty much anything goes ..
 
 I stamped 2 feathers and cut them put.

Then I punch any holes I want into it - make them big as they will shrink too!
 Then heat it using a heat gun.  Or you can put them in the oven, there are temperature instructions in the pack.
 Now this is the scary bit - as it heats and shrinks the plastic will curl.  DO NOT PANIC!!!!  Just keep heating it and it should all uncurl and flatten out.
 See!!!
And here is what I did with it them - they are feather charms for the card.
 The image is Visible Image Edgar, the feather is fom their Free your Imagination set, the papers are Prima Engraving.  The flourish is a Tim Holtz one, covered in frantage shabby wine, and heated.


And here is another quick idea ...

Using your primed shrinkie and a flower die and alcohol inks.
 Cut your flowers out and before taking them out of the shrink plastic colour them using alcohol inks - it is less messy leaving them in situ!
 Punch any holes you want - I am going to layer these up so I punched the holes in the centres.

 Now shrink ...


 I only wanted these three ...


 And I layered them together using a brad ...
 Then I took a metal tag availabel from the shop, ran it through an embossing folder, covered it in alcohol inks and added the flower.  Even the seam binding has been stained using the alcohol inks.


 And the children can have fun - school bag charms made by Ellie and her friend...

And Easter key rings made from my Gran when Ellie and Beth were younger.


 I hope that has wetted your appetite to play with the fabulous shrink plastic - endless possiblities!! 

Do pop over to the shop and facebook group to see what other fabulous things are in stock.

And don't forget, there is also a That Craft Place challenge every fortnight - you can find it HERE.

Saturday, 16 March 2013

Altered bird box - tutorial

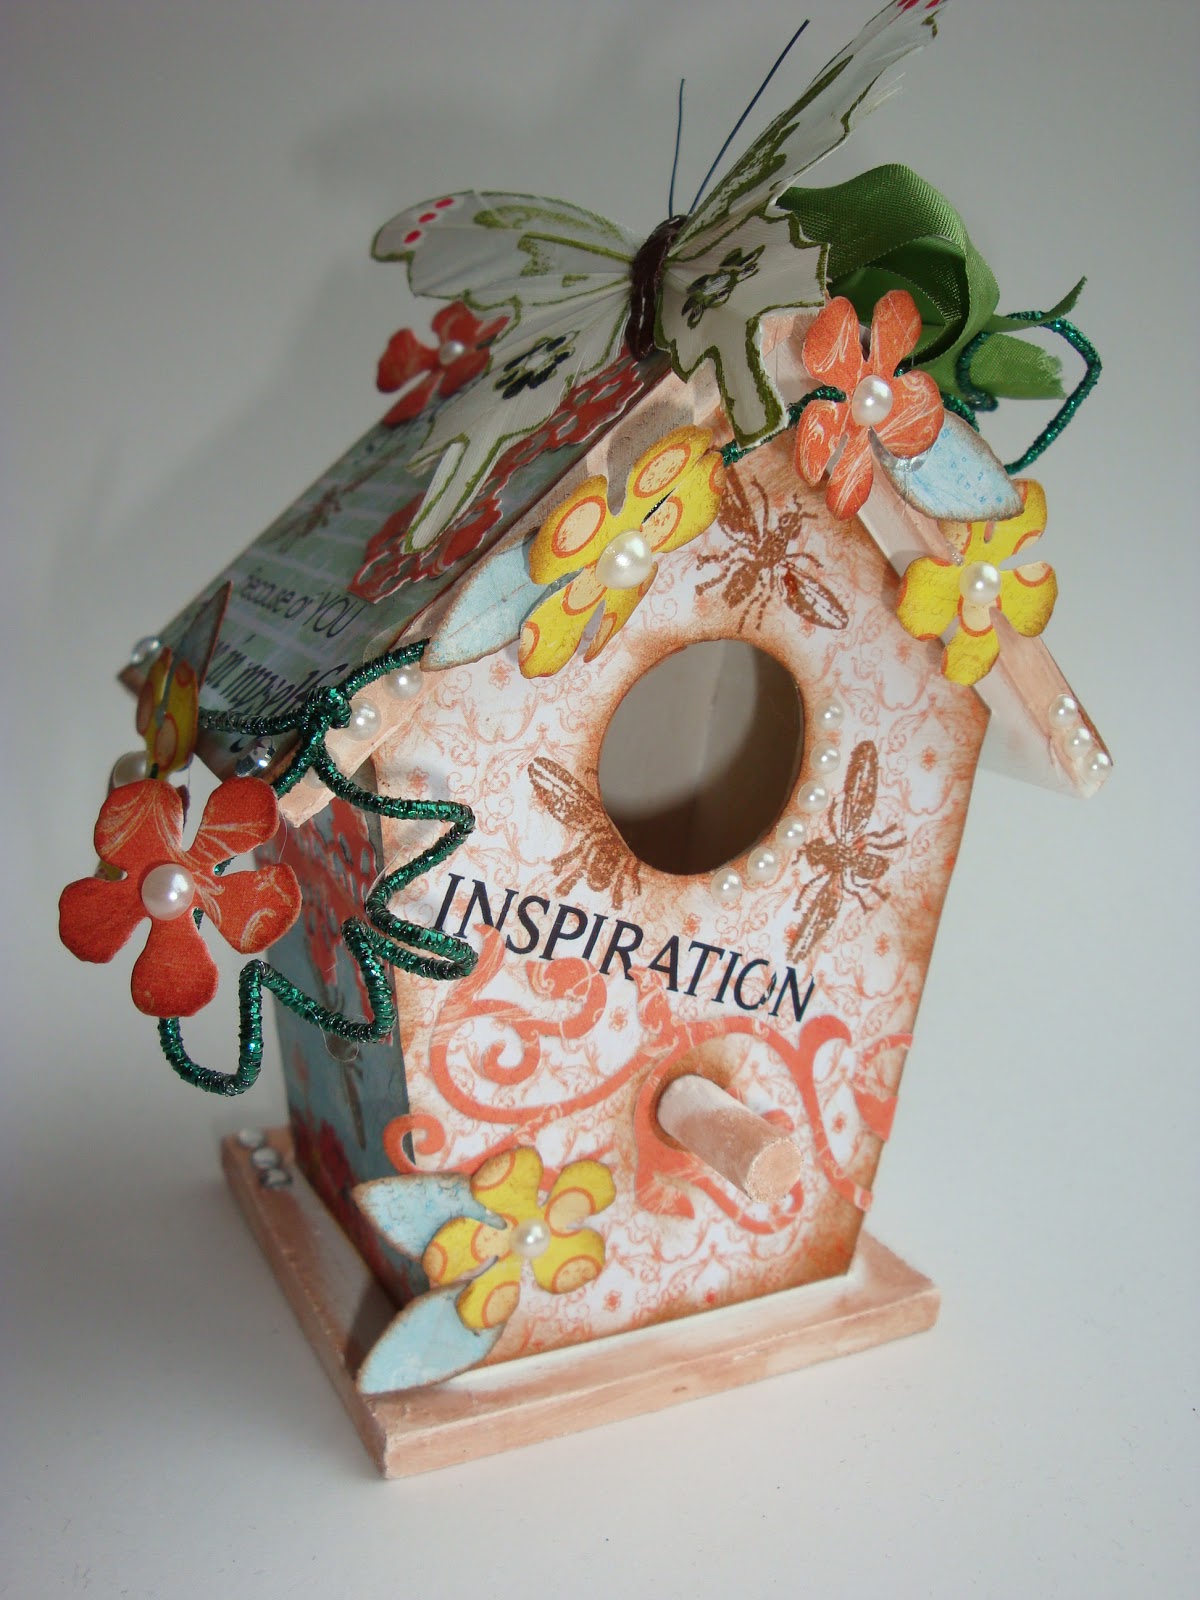
Hi all it's Lizzy here with a little project for a rainy afternoon! Here I will try to explain how my little bird box became a pretty altered creation, just ready for some Lavender or Pot Pourri... or even a key holder if I had added hooks!

 
This is the finished project, and nearly all the elements used are available at Lisa's shop, I will list what I used as I go:
 
 
This is the start, I used gesso to cover the wooden box, but you could use white acrylic paint just as well. Leave to dry overnight.

I used the roof to make a template, and used Zepher paper pad by prima, it has a fabulous green paper that looks like little roof tiles.... I cut 2 of these.

I used Vintage photo to distress the edges, I did this for all the paper peices I cut out.

Here it shows the back peice already distressed and ready to stick down, just another little process to go yet!

I used the previous paper peice and made a copy paper pattern for the front,  I then had to measure and determine where the front perch and hole would go, using a paper pattern meant it didn't matter how many cuts I made...

Here it shows how I then drew around the copy paper pattern, you can just see the feint lines, and then I used my craft knife to cut out the holes required.

I then used my Vintage photo distress ink to ink all the edges of the box, it doesn't matter if you miss bits or get too much ink on the wood, most of it will be covered up with the papers.
 

I cut leaves and flowers using Spellbinders Rose Creations, again the papers are from the Prima Zepher paper pad.


Here shows the papers now attached with glue, cosmic  clear dry is excellent for this job, I have used my stash dies to decorate the roof and sides, and the wonderful Crafts Too Vine corner for the front. I generally cut these to fit!  The butterfly is from Lisa's shop..a few rub on's to add to the background.

So here we are, finished!  I have added the flowers to wire and attached using a hot glue gun, I have made a beautiful green bow from seam binding, (Lisa's shop) and stamped some random bees on the background to complete the look.

An another view, with pearls added too!  Sometimes I just need to stop there!  You could use anything to alter in the same way, Lisa has loads of stuff to choose from, and you could used stamps instead of papers to embellish, it's up to you. I hope you enjoyed this journey with me.
 
Lizzy xxxx
 

Wednesday, 13 March 2013

Plastic milk bottle ideas

I like a bit of a play, and since my alcohol inks were out I thought I would have a go at using them on a couple of plastic milk bottles we have - plastic milk bottles are a bit of a novelty in our house as we get millk in glass bottles from the milk man!!! But we needed extra at the weekend.

First clean your bottle out thoroughly (kind of obvious really!!)
Then cut out the section you want ...
 (I know its not the same bottle - I was so excited I forgot to take the first picture!!!)

Then go over the plastic with alcohol inks and a blending tool until you get the effect you want (again too carried away to take a photo!!)

Then stamp your image, or die cut the shape you want onto the plastic.  I used the large butterfly from Visible image.
 I cut.them out - make sure your ink is really dry or it will smudge a little when you touch it. 
 Easy peasy.
And here is the card I made with the butterflies...

So then I had to play more ...


You can use your dies to cut the bottle - I used Tim Holtz dies for this card ...

As well as using alcohol inks to colour the flowers, I had a play with my heat gun.  You just need to be careful not to over heat the plastic, move your gun round alot, and let the plastic cool before doing anything with it, and it should keep its shape and not melt.  I used Stampendous frantage in aged wine and aged teal over the butterfly border, and Ranger sticky embossing powder and glitter on butterflies.  Sticky embossing powder is amazing - stamp your image in versamark, add the sticky embossing powder, heat and throw on glitter, glamour dust, anything sparkly, and it sticks to the embossing powder - amazing!


Do pop over to the shop and facebook group to see what other fabulous things are in stock.

And don't forget, there is also a That Craft Place challenge every fortnight - you can find it HERE.

Altered box

 Today I am showing you box I have altered using supplies from Lisa's fantastic shop.  Lisa stocks a fantastic range of things to alter, from notebooks, to tiles, photo frames, cotton reels, bags and boxes.  And also a fabulous range of stamps to use on your altered projects.

It was a sturdy cardboard box that I was sent some crafting supplies in a while ago, and I thought it would make a pretty box ...
 I painted the box using acrylic paints and added some vintage photo distress stain, to create a worn look when the paint was dry.  I stamped the large butterfly and butterfly stamps from Visible Image over the top of the box using versafine vintage sepia ink, and then the sentiment from the Free your imagination stamp set from Visible round the sides.

 
I cut some fabric flowers ourt using my Tattered flowers die, and stained them using distress inks.  I also stained the rose ribbon using victorian velvet distress ink.  Once the flowers were dry I punched a small hole in them, added the stamens and scrunched them up, and spritzed them with mist to make them sparkle.  Then I added them to the cotton reels, which were also distressed using vinage photo distress ink.

And a closer look at those flowers.
Its going to be my Mum's birthday present - hope she likes it!!


Supplies:
Image: Visible Image large butterfly, butterfly,
Sentiment:Visible Image free your imagination
Colouring medium: acrylic paint, distress ink
Papers:
Embellishments: fabric flowers, stamens, cotton reels

Monday, 11 March 2013

Giveaway

Morning Crafters 
Lisa Over at That Craft Place has got a lovely Monday Morning Give-away 
All you have to do is come and join our facebook Group and Like the Photo
Here's what you could win 


Dont forget our Anything Goes Theme
over at our Challenge Blog
We would love to see your Projects 

Hugs Erin 

Sunday, 10 March 2013

Colour Tutorial


Hi its Erin Here i have a Tutorial with Pro Marker's for you 


Repeat Cool Grey are Warm grey for any shading you wish to !!!
Now for some information 

Now for the Finished Card


I have used My Pro's and Tria's from That Craft Place Shop

Do pop over to the shop and facebook group to see what other fabulous things are in stock.


And don't forget, there is also a That Craft Place challenge every fortnight - you can find it HERE.

Hugs and Kisses 
Erin